Showing posts with label How To. Show all posts

Monday, August 23, 2010

Recycled Samples

A while back I made these: 

My sister in law and her boyfriend thought they were pretty cool and asked how I made them and what they were made of. I told them I'd make them one. Here is the how-to and the end result. 

First step is to have access to, or be creative enough to get some free marmoleum/linoleum samples - really any sort of flooring sample would probably suffice so long as they are all the same dimensions. As an interior designer I mistakenly ordered a box of every sample forbo made - not only that but they sent me 3 samples of each all in a nice file box. There was no way my work had any need for this quantity of samples so I took the gigantic (and heavy, I might add) box of samples home with me. There it sat for about a year and a half. I had no idea what I was going to do with all of these samples and the thought of just throwing them out made me cringe. I'm not a hippie "save the Earth" Eco-person but I try to do my best at keeping this world a greener place, so I recycled them into art!
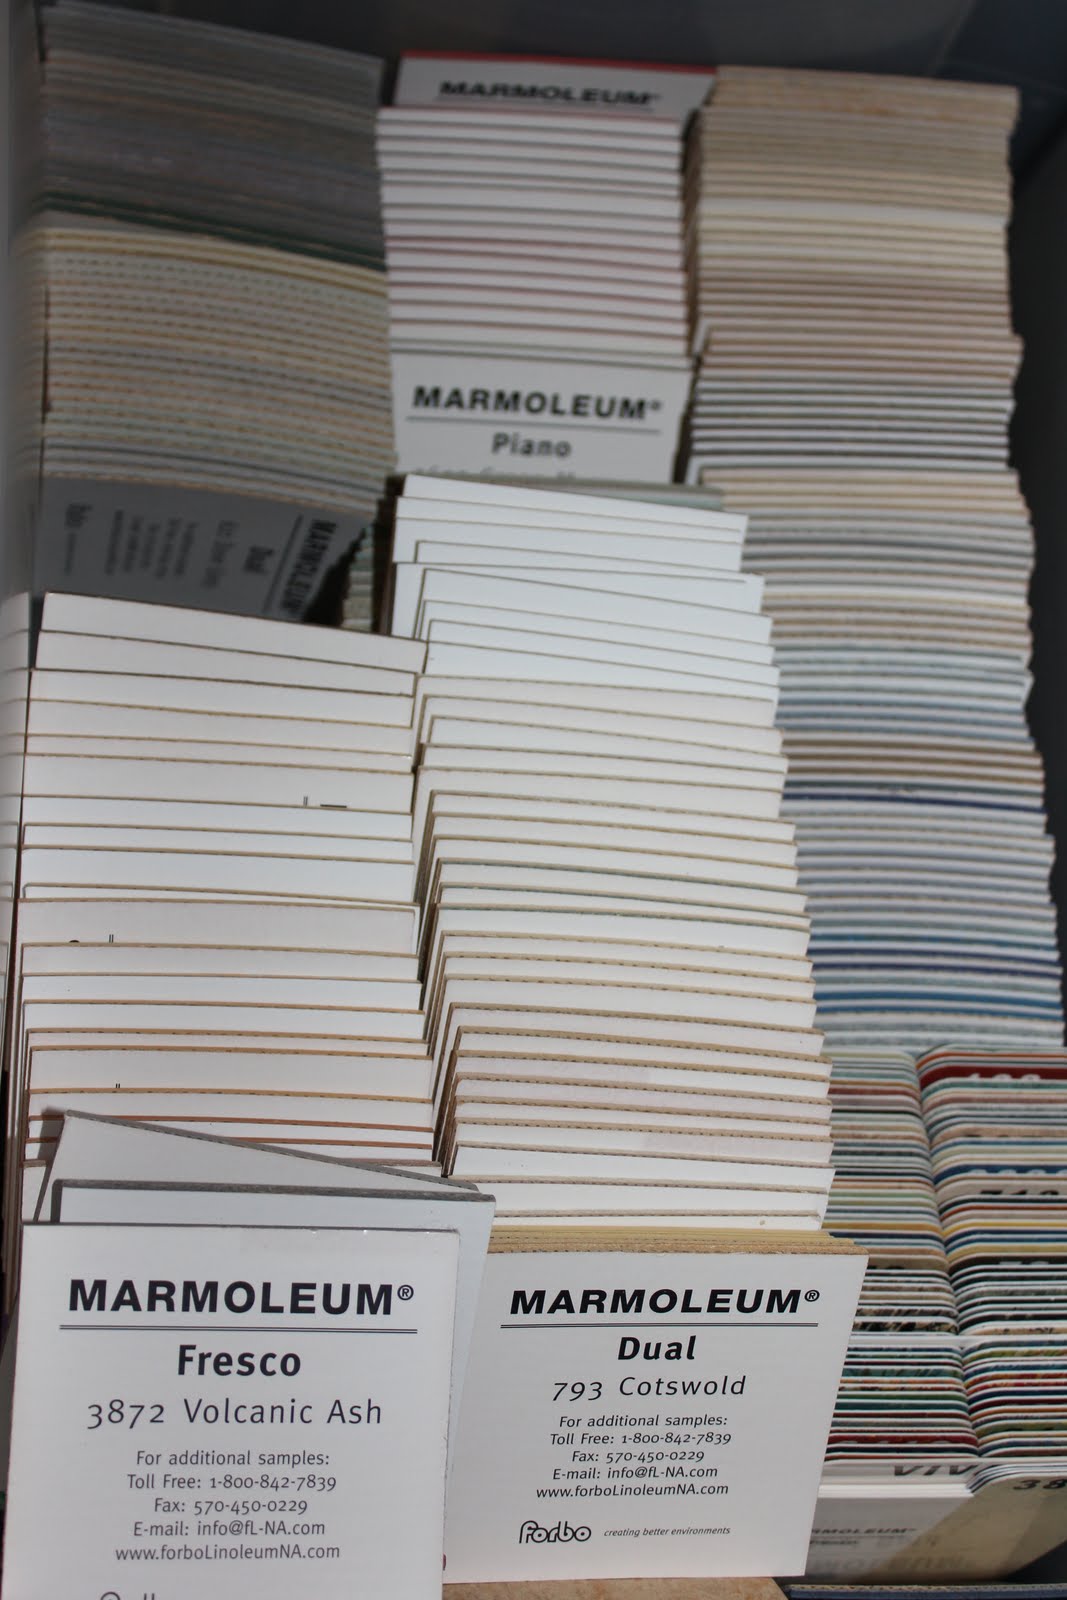
Next is to pull out the colors you think you'll want and lay them out on a piece of 24x 36 foam core (I had a ton of this leftover from school projects). Granted you can make your art any size you want, I'm partial to larger artwork so that is what I made!  
 After the design is set, grab yourself a tube of liquid nails and a caulking gun. I used the cardboard dividers that separated each color of the linoleum samples as a spreader for the glue and did small sections at a time, starting at the outside of the foam board (it's a straight edge) and working my way until I ran out of room on the board. It's a little hard to see but there is some metal mixed in there - that my friends is a metal laminate sample that was leftover from another project at work. I tucked it under the forbo samples and kept it the same size. Definitely adds a different texture and a little more interest to the overall piece of art, especially when you add more than one.
 Cut off any excess foam core with a sharp blade, you can choose to use a straight edge or just follow along the edge of the forbo samples like I did.
And the finished product! (note: I used the cardboard dividers yet again as the hangers on the back of the foam core, just takes a hole punch and more liquid nails!)

Monday, November 23, 2009

Finishing the Cider

This is an update to my Hard Cider is Easy post.

We finally got around to bottling and kegging the hard cider. I think we waited longer than we should have to get to this point but we finally did it. This is what one of the one gallon jugs looked like after it fermented in the jug for about a month and a half (3 weeks would have sufficed). You can see that the yeast went crazy and bubbled out of the container (which is why an air-lock with a bubbler would have been better to use).
Cider
We started off by sanatizing everything we were going to use.

Cider
We then  boiled about 2 shot glasses of sugar with enough water to allow the sugar to dissolve, let it cool to room temperature and then poured the jug of cider into the pot.
Cider
Very carefully poured this mixture into the bottles.
Cider
And finally, we capped them and put them back into the temperature controlled freezer set to about 68*.
Cider

The reason we added sugar to the mixture was to allow the cider to get bubbly in the bottles. We tasted one of the bottles we did of the Raspberry Cider and I wasn't pleased with it yet, but it has potential. We'll let it sit a while. The regular apple cider that Craig did 5 gallons of, smelled WONDERFUL!! He kegged it and now we're letting it sit a while. I am sure we'll be enjoying it with company for Thanksgiving and Christmas this year!!

Tuesday, September 29, 2009

Honey Bars (Take 2)

So I wasn't satisfied with the Honey "Bars" I made previously and looked up another recipe. I like this one much better. German Honey Bars Lebkuchen

Honey Bars
Again, I modified this recipe but only by one ingredient. Anyone know how expensive cardamom is? I do.
Honey Bars
I ended up using ground cloves instead, I believe it's a completely different flavor but that is what I had in the cupboard and I wasn't about to spend $16 on something I've never used and the likelihood of using it again was slim! That and I know that cloves and cinnamon go well together. Anyways, I mixed everything up according to the recipe and spread it into a 15x17 cookie sheet (the kind with the sides) instead of a "jelly roll" pan, which I didn't have. The recipe says to spread the dough evenly into the prepared pan...well that wasn't easily done because the dough is incredibly sticky. It was like super thick peanut butter that only stuck to the spoon and not the prepared pan.
Honey Bars
After spending about 10 minutes trying to spread the dough unsuccessfully I had an idea: use the back of a metal spoon and cooking spray (good ol' cooking spray). My idea paid off and after a few extra sprays on to the back of the spoon (when the dough started to stick) I finally had it evenly spread in the pan.
Honey Bars
So because I was using a larger pan than the recipe called for I decreased my cooking time. I set it to 10 minutes to be safe and added minutes until I felt it was fully and evenly cooked. It ended up being about 15 minutes. When I read the glaze recipe I thought that the dry to wet ratio of ingredients was a tad off, but it worked out perfectly. If you're not into the lemony flavor you can use milk instead. Once they cooled down, I cut them into the recommended size pieces. Cutting was a little difficult as was getting them out of the pan. I suggest using a bendable spatula to get 6-8 out at a time, some might stick though.
Honey Bars
These have a GREAT flavor and they reminded me of Christmas, I later discovered that "Lebkuchen is a traditional German product baked for Christmas, somewhat resembling soft gingerbread." - Wikipedia
Go figure.

Honey Bars (Take 1)

So Craig and I are going to an Oktoberfest put on by his home brew club (Temecula Valley Homebrewers Association) during the first weekend of October. The theme for the event is (of course) German and we'll be having a pot-luck dinner the 2nd night in. So I was on a mission to find a yummy dessert to make and share. I found this recipe for German Lebkuchen Bars (German Honey Cakes) and thought it'd be the perfect dessert after all of the other German foods everyone else was bringing. I hit up the local grocery store only to find out that they don't carry two of the ingredients I would need (both of the candied items). Now, normally I would figure out something to put in it's place, but it would have ended up being 1/2 a cup of modified ingredients and I wasn't about to be that courageous. So I stood in the middle of the baking aisle, called my Mom to ask her a few “what if” and “what is” questions and then began looking up a different recipe for the same thing that required less “special” ingredients. After finding five difference recipes I finally found one that only required I buy two ingredients (as I already had everything else at home).

Here is the recipe I ended up with: Honey Bars
Honey Cake
Now, I ended up doubling the recipe and tossed in a few modifications based on other recipe's I've seen. I used sliced almonds instead of walnuts because I am not a big walnut fan and I don't know many who are. They sell sliced almonds in 5oz packages so I went with that, which was just under 2 cups worth. If you don't double the recipe then the smaller size package of sliced almonds will work fine (I think it's a 2.5 or 3 oz package). I also added 1 tablespoon of cinnamon and a dash or two of ground cloves. It just sounded good, but keep in mind I added those amounts to the doubled recipe. According to the bottom of the baking instructions it says if you use an 8x8 pan to only fill it 2/3 full. I only have one 8x8 pan so for the first round of baking I filled mine 1/2 full and it puffed up like a nice cake, ended up adding about 10 minutes to the baking time, and cooked unevenly. The second round of baking I didn't have enough batter to get to even the half way mark on the 8x8 pan it ended up being about 1/3 full, took only 30 minutes, and baked evenly throughout. The entire house smells wonderfully sweet but I am disappointed in how these turned out. I was expecting "bars" not "cake" but they turned out to be a very "heavy" cake so they won't crumble apart when cut into serve-able squares. My overall notes after tasting them: I am glad I added the cinnamon, otherwise these would not have much flavor to them, they are a bit dry (not bad) so even adding some chopped apples to it would be great! I felt like I was eating an apple cinnamon muffin, only without the apple and not a muffin. I would recommend cream cheese frosting on these, too (but alas, I have none).
Honey Cake
Cooking tip: When cooking with honey, spray some cooking spray on your measuring utensils before measuring out the honey. It will prevent the honey (or other super sticky ingredients) from sticking! (Credit to Paula Deen for that lifesaver!)
Honey Cake

Now, if I could just get someone else to clean the kitchen.

Sunday, September 27, 2009

Hard Cider is Easy

We went up to Oak Glen this weekend to pick up some apple cider from Riley's Farms. Its a very Julian-esq place, orchards and fields of fruits and vegetables all surrounded by mountan's, trees, cabin-esq and victorian-esq homes. One of the things on my list is to go there and pick fruit with my husband. They have raspberry, pumpkin, apple, pear, strawberry, watermelon, cherry, flower, peach and ollalieberrie(what?) fruit picking days. I think we may try to make another trip there before Thanksgiving to pick pumpkins (cooking pumpkins, not jack-o-lantern pumpkins). If anyone is interested in checking out the place, their website is here. We ended up bringing home a total of seven gallons of cider, five were just apple, one was cherry-apple and the last was raspberry-apple. I even got a small jar of pumpkin butter to share with the family on Thanksgiving, it tastes like pumpkin pie but with a more spreadable consistency - very yummy and I can't wait to try it on some toasted whole wheat or sweet bread!

The second half of our day consisted of "brewing" the cider into hard cider. I didn't know how simple it was. Basically in a nutshell you put the cider in a carboy (6-7 gal glass or plastic jug) and add a vial of yeast to it. Of course you have to be sure the temperatures are right and to leave out any contaminants.

These 5 gallons of apple cider went into a 6 gal carboy:
Cider
Pouring the cider into the carboy (we repeated the process with the other two flavors into two, one gallon glass jugs):
Cider
Then we pitched the yeast ("pitched" is a fancy way of saying "poured"). For the 1 gallon batches we split a vial of yeast for each, for the 5gal batch we used one whole vial:
Cider
Added the stoppers - which prevents foreign objects and bacteria etc. from entering the carboy as the cider ferments (the stoppers we had didn't fit in the 1 gal jugs so using foil works, it's just a bit risky). Then we placed the now fermenting cider into a freezer with a temperature controller set at 68 degrees:
Cider

All in all it took us about an hour to do everything, including pre-cleaning and post-cleaning. These should all ferment for about two weeks and then it's on to the next step of carbonating, kegging and bottling. The cost per gallon of cider was $9 for the apple (in the glass jugs) and $10 for the cherry and raspberry (in plastic milk jugs).

Today was a great day!